

We’ve all been there. You glance into the mirror and your heart aches a bit. Your hair is dry, perhaps cracked, and surely abused. It is screaming for relief, yet you have a big event, a job interview, or you simply miss your sleek, straight style immensely. The problem is real: how do you achieve that smooth look that you adore without burning your delicate strands to death?
Styling damaged hair is like walking a tightrope. A misstep and you may cause serious breakage. But take a deep breath! One can get a straight style without entirely damaging the health of your hair. It only needs a bit of additional patience, the correct approach, and a significant amount of care.
A game plan will help you get your hair smooth and straight with minimal damage.
The Prep Work: It Starts in the Shower
You must set the stage before you even consider plugging in a hot tool. Imagine your hair is a canvas; when the canvas is coarse and tattered, the picture will not be good no matter how costly the paint is. In the case of damaged hair, the shower is where healing starts.
Disregard clarifying shampoos at this stage. They deplete natural oils that your dry hair is begging for; go instead for a sulfate-free hydrating shampoo. You want to wash using gentle detergents. This should be succeeded by a deep conditioning mask. Do not just stick it on and rinse it under water, but allow it to soak. Allow it five to ten minutes to sink into the hair shaft. Look for ingredients such as keratin, argan oil, or shea butter.
This process introduces a moisture buffer. Hair that is hydrated is pliable, and it is the pliability that keeps your hair from breaking once you put strain or heat on it in the future.
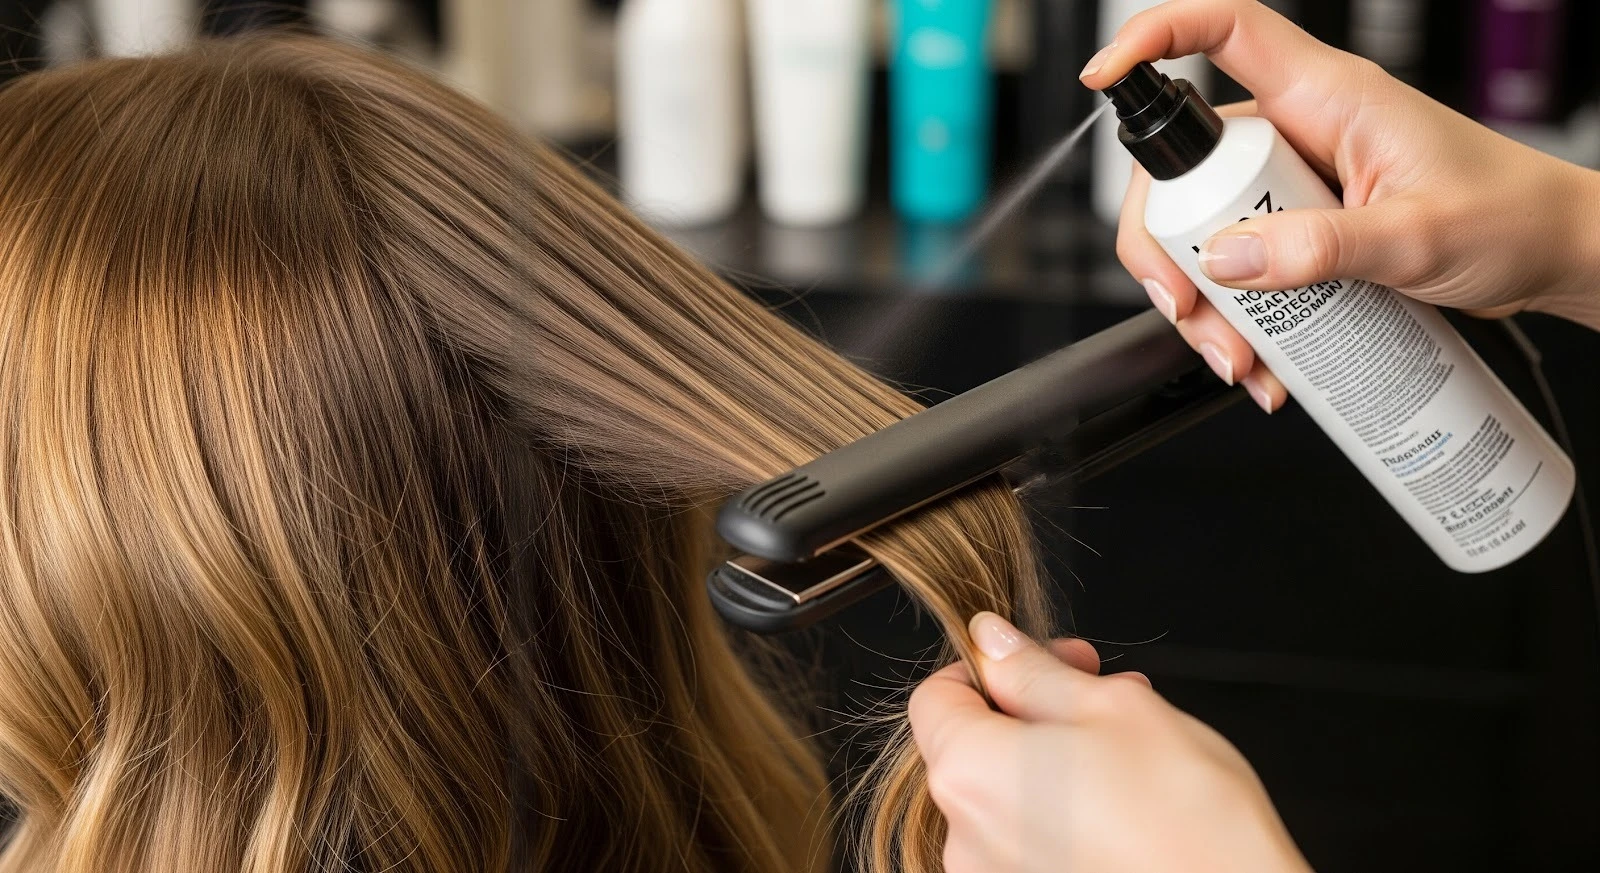
The Important Factor: Heat Safety is Non-Negotiable
There is only one thing that I want you to remember after reading this guide: never put heat on damaged hair without protection. It is like going out in the Australian summer sun without sunscreen—you will get burnt.
Hair should be damp (not wet!) when you apply a good-quality heat protectant. These come as sprays, creams, and serums. A serum or a lightweight spray may be less effective than a cream for damaged hair, since a cream is needed to smooth it out and offer better protection to the cuticle.
This barrier does two things. First, it spreads the heat more evenly, so you do not get hot spots burning your hair. Second, it preserves moisture, which prevents the water in your hair from boiling and forming those horrifying bubbles in the hair shaft (that is a fact, and it is called bubble hair).
Drying: The Gentle Approach
The following is one of the mistakes that a typical person commits: attempting to straighten wet hair using a flat iron. When you hear a sizzling noise, stop! That is the sound of your hair boiling. Before a straightener comes into contact with your hair, it should be 100 percent dry.
The best friend to get there is air drying. In case you have time, let your hair air dry until it is approximately 80 percent dry. This reduces the amount of direct heat used. You should blow dry on the lowest heat setting possible.
It is best to use a round brush with boar bristles. Boar bristles are softer than plastic and can be used to spread the natural oils from your scalp down the length of the hair, providing shine and protection. Have the nozzle on your dryer pointed downwards, root to tip. This helps the cuticle to flatten, making the hair appear straight and smoother even before you turn on your iron.
Choosing Your Tools Wisely
Not all tools are created equal, and once your hair suffers, the quality of your equipment matters very much. Very old, cheap straighteners usually have uneven heating elements. This forces you to repeat the same part of the hair several times to ensure it is straight, and each time it gets worse.
Invest in a high quality flat iron with ceramic or tourmaline plates. These materials produce negative ions that close the cuticle and trap moisture, leading to a smoother finish using less heat. More importantly, make sure that your tool has adjustable temperature settings.
You do not have to turn the dial to 450°F (230°C). Professional chemical treatments are not for everyday styling! In the case of damaged hair, it is better to remain between 300°F to 325°F (150°C – 160°C). It may take a bit longer, but it will make your hair grateful. With damaged hair that is fine, go even lower.
The One-Pass Rule Technique
It is now time to actually straighten. The goal here is efficiency. You do not want to expose your hair to heat for too long.
Part your hair down the back. This may be tedious, but doing it bit by bit makes it possible to do everything in a single run. When you take a large piece of hair, the middle will not get hot, and you will find yourself ironing your hair three or four times.
Pull the strand of hair straight with a comb or a hairbrush (the chase technique is miraculous in this case, as you can run a fine-tooth comb into the hair in front of the straightener). Slide down the hair in a steady manner with the iron. Don’t stop in one spot! Stopping forms creases and causes the concentration of heat in one place, which results in breakage.
Keep in mind the One-Pass Rule: If it is not straight following one long, steady pass, then you are either using too many layers or have not applied enough tension. Do not simply repeat the same ironing. Go away and return to it later when it has cooled down, should there be a need.
Post-Straightening Care
When you have that glossy look, lay aside the tools. Your hair is a weak thing; it is molded into a new form. Finally, apply a light oil or serum to improve the ends, which are likely the most damaged part of your strands. This brings about shine and masks split ends.
During the following days, concentrate on no-heat maintenance. A silk or satin pillowcase helps reduce friction during your sleep. Extend the life of your style with the help of dry shampoo and avoid washing and restyling (and reheating) frequently.
The Long Game: Mending the Mess
Straightening damaged hair is a short-term solution to styling, but this requires a long-term plan on how to fix the real problem. There is no way you can stick split ends back together (the only remedy for these ends is a trim!), but you can reinforce the bonds of your hair.
Include bond-building treatments in your routine. These do not need to be ordinary conditioners; they literally go to a molecular level to heal the damaged disulfide bonds within your hair structure.
Also, examine your hair treatment products shelf and evaluate any missing products. Do you use leave-in conditioners? Do you use a protein mask once per week? The process of fixing broken hair is not a sprint; it is a marathon. The fewer times you style your hair, the more it will endure occasional heat styling.
Knowing When to Stop
Lastly, one has to be honest with themselves. There comes a moment when you have gone too far and the hair will not be able to take any heat. When your hair is wet, if it feels like gum, or one of the strands snaps easily, or is much thinner at the ends, you need to rest it.
Temporarily adopt heatless styles. There are buns, braids, and accessories which are fashionable and will provide your hair with much-needed rest. Miracles can also be achieved through a good haircut. Cutting off two inches of dead, stringy ends will make your hair look thicker, healthier, and straighter than keeping that extra length ever could.
Must Read: Custom Metal Fabrication vs. Mass Manufacturing: Key Differences You Should Know
Wrapping Up
It does not need to be a disaster to straighten damaged hair. You will be able to have a smooth appearance and restore your hair to health by focusing on protection, reducing the temperature, and applying the appropriate techniques.
What has been your saving grace in terms of heat protectants or routines that rescued your fried hair? What are your tricks and tips? Leave a comment below so we can help one another in regaining our healthy shine.